





handwriting practice for kids
Hello! I’m Andrea Schiffer, founder of Dancina, a 2001 Swing Dance World Champion, and an Amazon bestselling educational author. I believe learning to write should feel encouraging from the first mark on the page. A short routine, a clear example, and plenty of praise can help your little one enjoy each small step.
If you are a mother or grandmother looking for handwriting practice for kids, begin with what your little one can manage today. A three-year-old may enjoy drawing lines, circles, and letter-like shapes. An older little one may be ready to form letters, join cursive letters, or write a short note. There is no need to rush from one stage to the next.
Start With Writing-Ready Habits
Before asking for a perfect letter, help your little one feel comfortable at the table. Choose a chair that lets their feet rest on the floor or on a small support. Place the paper where they can see it clearly. Keep shoulders relaxed and leave enough room for the writing arm to move.
A pencil should sit comfortably between the thumb, index finger, and middle finger. If your little one is still using a whole-hand hold, offer short crayons or pencils that are easy to manage. Avoid turning the grip into a battle. Show the hold, let them try, and return to it gently on another day.
Simple play can prepare the hands for writing. Try rolling dough, threading large beads, moving small objects with tongs, or drawing broad lines with chalk. For younger little ones, these activities can come before formal letter work. The aim is to make marks with growing control and enjoyment.
Good handwriting practice for kids also begins with a clear direction. Model a letter from its correct starting point, then move the pencil the same way each time. Your little one does not need to fill a whole page. Three careful letters give you more to celebrate than a crowded row completed in a hurry.
A Simple Five-Minute Routine
Five focused minutes can fit naturally into the day. Choose a time when your little one is rested. Put away extra worksheets and keep only the pencil, the page, and one clear example in view.
- Warm up for one minute. Draw loops, waves, circles, or gentle lines across scrap paper.
- Show one letter. Say where the letter begins and let your little one watch the full movement.
- Trace it slowly. Follow a clear model or guided path two or three times.
- Write it independently. Try two or three letters without tracing.
- Finish with one small win. Choose a letter your little one likes and say exactly what went well.
Keep your feedback simple. You might say, “I like how you started at the top,” or, “That letter sits neatly on the line.” Specific praise helps your little one understand what to repeat. Correct one point at a time, such as the starting place or the size of the letter.
Some days, your little one may want to stop after tracing. That is fine. Return to independent writing on the next day. Steady repetition slowly builds familiarity, while a short session makes it easier to come back with a positive feeling.
Choose One Writing Style at a Time
Print letters stand separately. Cursive letters use flowing movements and joins within words. Both have a place, but switching between them in the same short session can be confusing for a beginner. Follow the style your little one is learning at school or choose one style for the current practice period.
For print, group letters with similar movements. Straight-line letters can be practiced together, followed by letters with curves. For cursive, begin with one lowercase letter and repeat its entry, body, and exit movement. Once a few letters feel familiar, introduce a simple join.
Keep the model consistent. A little one who sees the same letter formed in several different ways may not know which movement to copy. One clear model, shown slowly, makes the task easier to understand.
If your little one reverses a letter or forgets where to begin, point back to the example and repeat the movement together. Treat the correction as part of learning. A lovely session is one where your little one finishes knowing one movement a little better than before.
Helpful Tools for Letter Practice
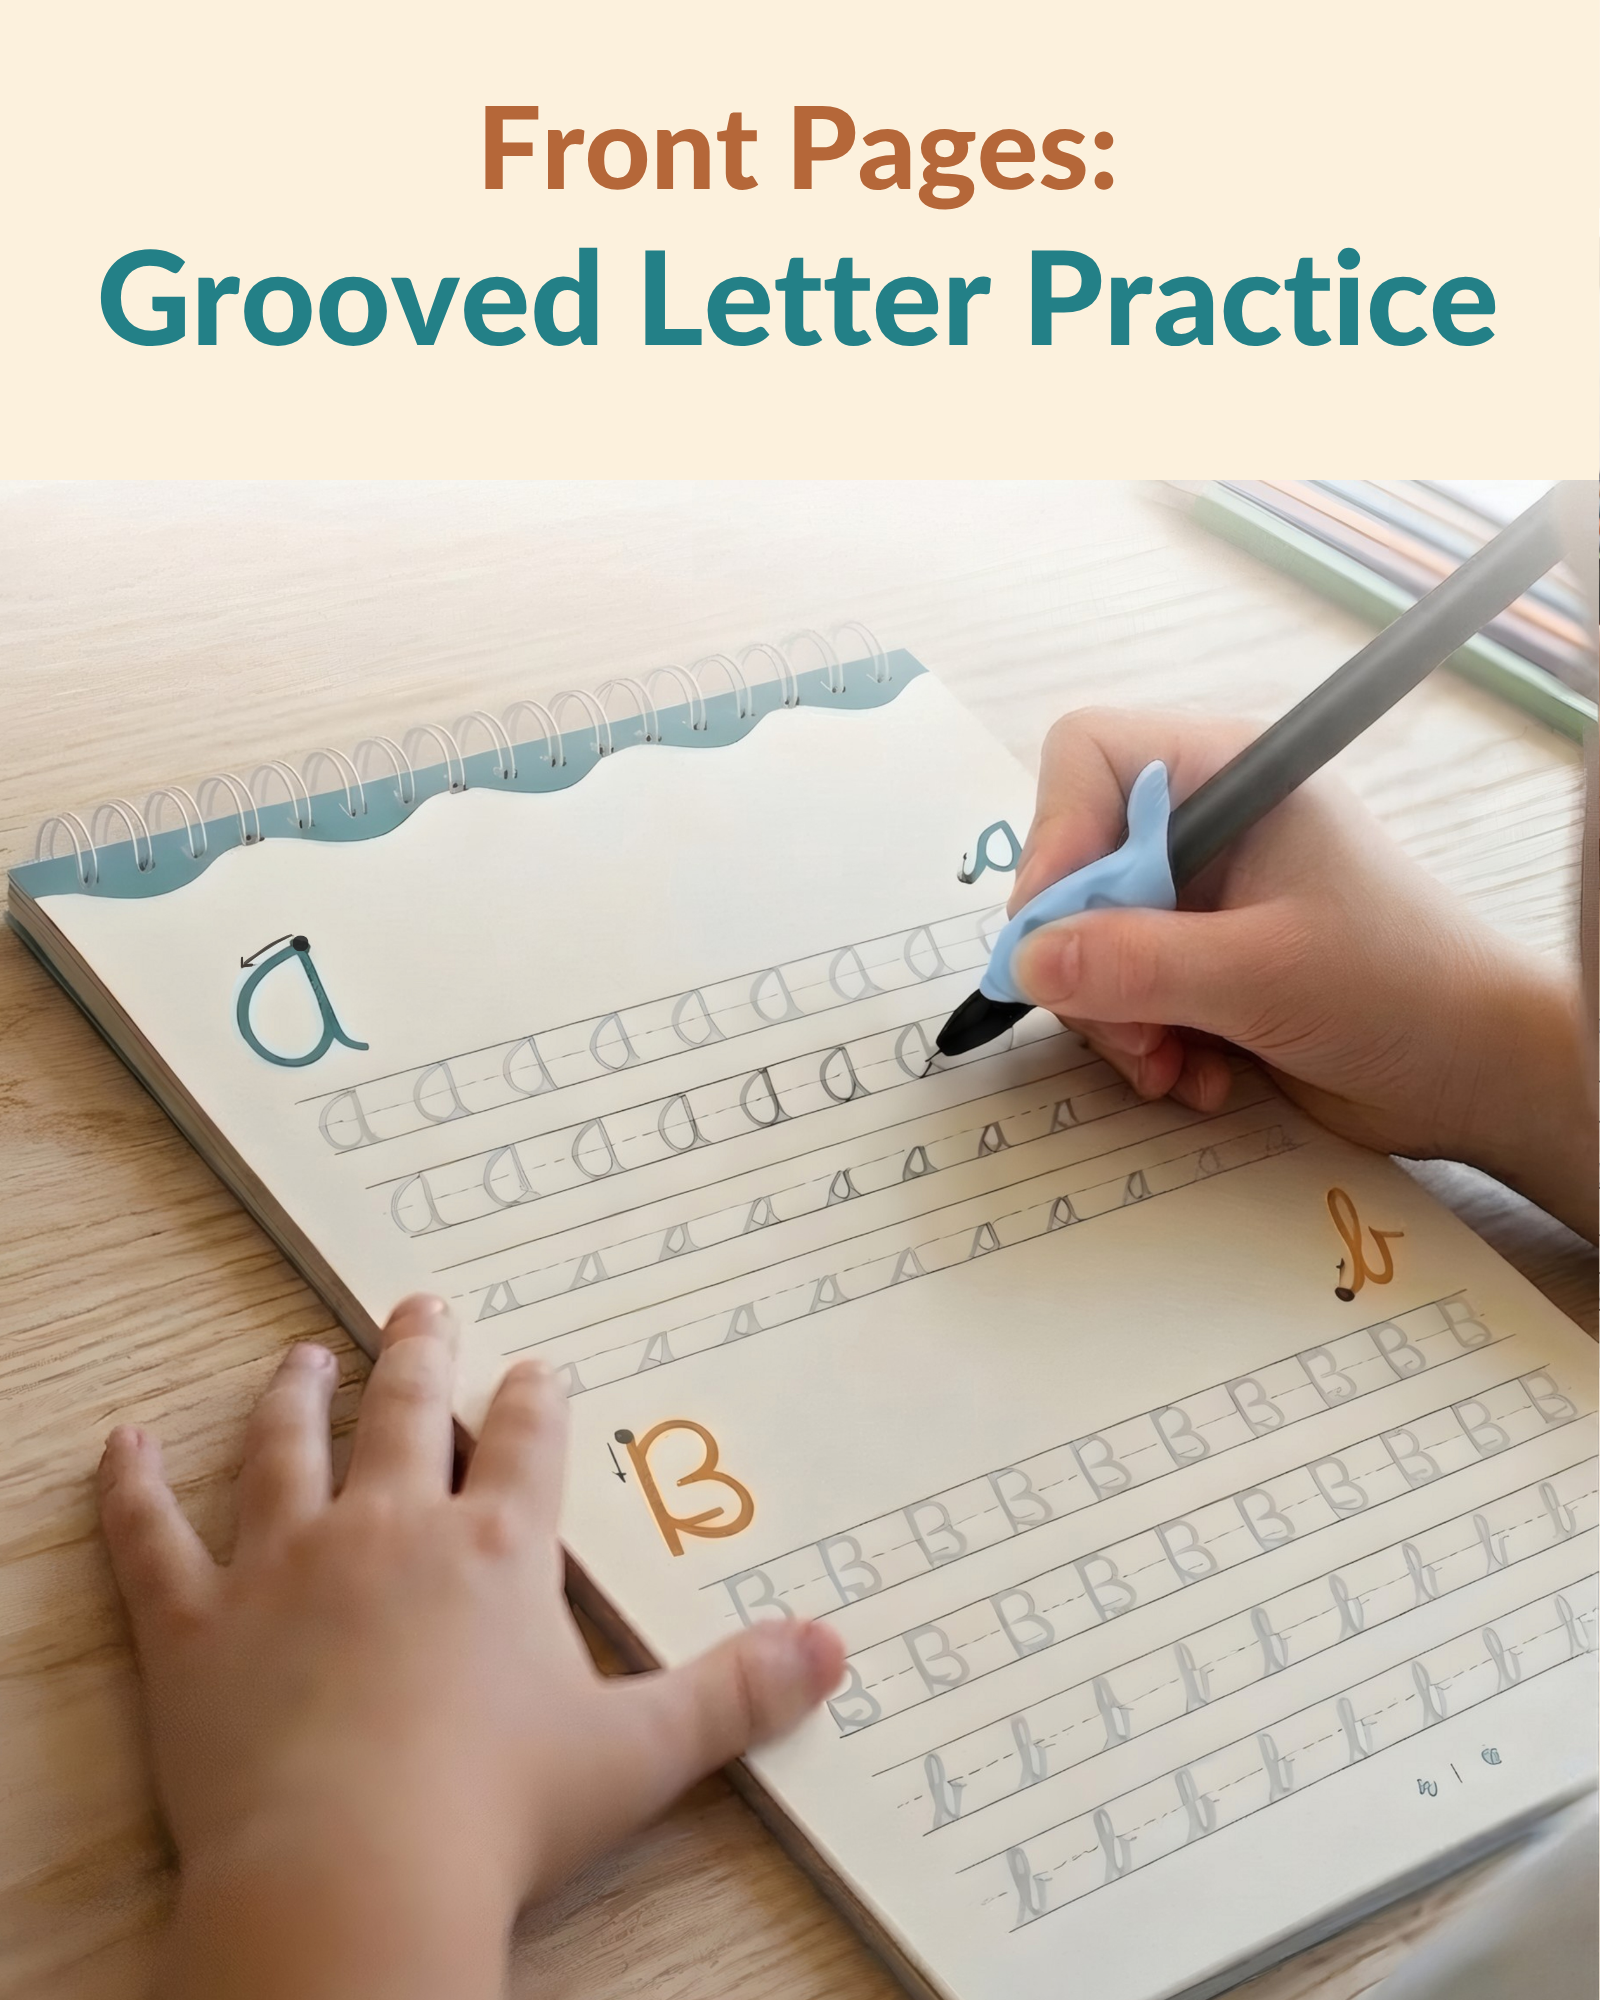
The best tool is one that matches the task. Blank paper is useful for broad drawing and mark-making. Ruled paper helps your little one see where a letter sits. An individual letter sheet keeps attention on one shape instead of a crowded page.
Dancina Learning offers individual lowercase and uppercase cursive letter practice sheets. Use them when your little one needs a clear model for one letter at a time. Our printable 3-line practice paper gives a simple ruled space for practicing letter size and placement.
For reusable guided practice, the Magic Grooved Workbook brings both parts of its name together. Grooved letter paths guide your little one’s pen, while Magic disappearing ink fades in around 20-40 minutes so the pages can be reused. The workbook includes cursive letter practice, joins, and sentence practice. Your little one can repeat a movement without facing a fresh stack of pages each day.
Explore the Magic Grooved Workbook
Choose only the resource needed for today’s goal. If the focus is one cursive letter, use the individual letter sheet. If the focus is size and placement, use the 3-line paper. If your little one benefits from a guided path and repeatable pages, use the workbook. A simple choice keeps the activity clear.
Solve Common Handwriting Frustrations
Letters Float Above or Drop Below the Line
Highlight the baseline or use 3-line paper. Ask your little one to place the letter on the bottom line first. Work with one letter size before mixing tall, short, and descending letters.
Writing Becomes Messy After the First Few Letters
Reduce the number of repetitions. Two neat letters followed by a break may be enough. Check that the pencil is comfortable and that your little one can see the model without leaning across the page.
Your Little One Writes Too Quickly
Model the letter at a slower pace and say the movement in a few words, such as “start at the top, down, and around.” Ask your little one to match your pace for one letter. Do not add speed until the movement feels familiar.
Practice Feels Repetitive
Change the purpose, not the letter. Write the first letter of a favorite animal, make a label for a drawing, or add one word to a card. The movement stays familiar while the finished piece has a reason to exist.
Your Little One Avoids the Page
Make the task smaller. Offer a choice between two letters, trace just once, or begin with chalk on a large surface. Finish after a genuine success. The next session can add one more step.
Make Writing Meaningful
Handwriting becomes more inviting when it helps your little one make or share something. Try a name label for a toy box, a short note for a grandparent, a sign for a pretend shop, or a card for a friend. Younger little ones can draw first and add one letter. Older little ones can add a word or sentence.
Keep a small folder of favorite pages. Look back after a few weeks and notice one change together, such as steadier size or clearer starting points. Avoid comparing your little one’s page with someone else’s. Their own earlier work is the most useful comparison.
You can also build a small weekly rhythm around one practical goal. On Monday, choose the letter or join. During the next few short sessions, repeat the same movement on a guided path, ruled paper, and one meaningful word. At the end of the week, let your little one choose a page to keep. This gives the practice a clear beginning and finish without turning it into a test.
Let your little one help prepare the writing space too. They can choose the pencil, place the paper, and decide whether the finished letter will become a label, note, or card. A little choice can make the routine feel like their own. If a session does not go as planned, finish kindly and begin again another day. The habit matters more than one perfect page.
Most of all, protect the joy of learning. I would rather see a little one complete a few thoughtful letters and want to return tomorrow than finish a long page with tired hands. Consistent handwriting practice for kids can be simple: one model, one short routine, and one small win at a time.
Sources
Frequently Asked Questions
How long should a handwriting session last?
Five focused minutes is a helpful starting point. Choose one letter or movement, give your little one a clear example, and stop while the activity still feels enjoyable.
Should my little one begin with print or cursive?
Follow the style your little one is learning at school, or choose one style for the current practice period. Keeping the model consistent makes each movement easier to follow.
What should I do if the pencil grip feels awkward?
Offer a comfortable pencil or short crayon, show a relaxed hold, and let your little one try. Keep the correction gentle and return to it another day instead of turning the grip into a battle.
What if my little one reverses a letter?
Point back to one clear example and repeat the movement slowly together. Correct one detail at a time, such as the starting point, and finish by noticing what went well.
How does the Magic Grooved Workbook support repeat practice?
Grooved letter paths guide your little one’s pen, while Magic disappearing ink fades in around 20-40 minutes so the pages can be reused. The workbook includes cursive letters, joins, and sentence practice.
